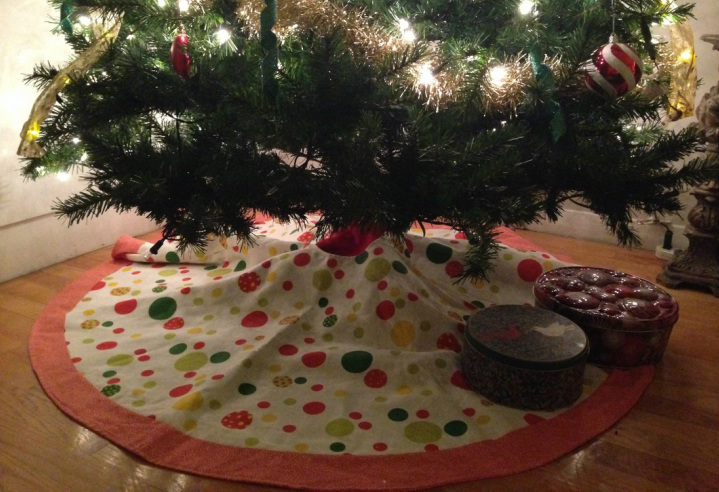
My beautiful, one of a kind, tree skirt #DIY
Oh Boy. I haven't touched a sewing machine since high school (over 11 years ago), and decided I really wanted a unique tree skirt. The best time/way to do was on my vacation visiting knowgirl Scarlett.. She is much more familiar with her sewing machine, and was able to do majority of the work while I picked out fabric and assisted. I make a really good assistant!
We found this pattern on Amy Butler's site, but honestly, we didn't do much research, and it seemed good enough. In the end, it made a great starting point, but used a lot of fabric, and so we mimiced it, but definitely ended up with our own.
We found this pattern on Amy Butler's site, but honestly, we didn't do much research, and it seemed good enough. In the end, it made a great starting point, but used a lot of fabric, and so we mimiced it, but definitely ended up with our own.
For fabric, I chose a bright polka dot pattern for the body, and something that kinda looks like a reddish animal print for the trim/back.
The Tutorial
(there is a slideshow below with many of photos of many of these steps, but we did enjoy our wine a bit much and steps are missing)
Purchases
- 3 yards of 45in wide body fabric ( I totally suggest home decor fabrics, they feel better) Get it Here
- 3 yards of 45in wide trim fabric
- 4 1/2 yards of fusable interfacing (we used Pellon SF-101)
- coordinating ribbon (or find some around your house)
- coordinating thread
Tools Needed
- scissors
- tape measure
- straight pins
- marker
- string
- sewing machine (obviously :) )
- wine or something stronger
- a good friend to help
Prep
1) Cut the body and trim fabrics in half, so they are each 1 1/2 yards long
2) Iron them
3) Sew both pieces together so they are now 90 inches wide by 1 1/2 yards long (do this for both trim and body fabrics)
4) Iron the seams
5) Fold the body fabric along seam, and then fold it again, to find the CENTER of the fabric and mark with marker (on wrong side)
Body
6) Lay out body fabric WRONG side up
7) Mark (or cut) string so that it is 24 inches long.
8) Have 1 person hold the string down at the CENTER point of fabric, while the other marks a circle, based on the string length
9) Double check as you feel necessary, and cut along that line
10) Use the same string, but measure 2 1/2 inches from center point, and mark
11) Cut along that line
Trim
12) Lay the trim fabric out WRONG side up
13) Decide how wide of a trim you want (allow for seams), and add that number to 24. Let's say it is 3.5 inches, which is what we did. Cut your string to 27.5 and repeat steps (7) & (8)
* make sure your circle isn't too big for the fabric that you have
14) Now lay your BODY fabric on top of the trim circle, and center. You can make sure its centered by using your measuring tape in random spots and confirming your 3.5 inch trim
15) Mark around your BODY fabric with your marker and cut along that line.
Putting the Top Together
16) Pin the inside edge of your TRIM that you just cut to the outer edge of the BODY fabric. It will seem odd with some bubbles, and it may not match up perfectly. Ours didn't, but we made it work.
17) Sew the trim to the body, where you just pinned
18) Iron your seams
Back
19) Take the extra trim fabric (that isn't a perfect circle, but rather the the leftovers from when you cut the circle) and from the curved line, mark 3.5 inches in on the WRONG side & cut. We are making a trim, but it will be pieced. You can't tell, its on the back and its the same fabric.
20) Line that up around the edge of the TRIM circle (that you cut the front trim from)
21) You may have to cut some more trim for the back, but don't worry, because you can line it up with the TOP fabric to check to make sure they are the same size/shape
22) Just like the front fabric, pin the inside edge of the trim to the outer edge of the back fabric
23) Sew & Iron your seams (Do you hate your iron yet?, you will soon)
24) Cut your INTERFACING into 3 equal sections and sew together so it is wide, instead of long.
25) Lay your BACK fabric, WRONG side up, out and lay the INTERFACE on top, with the fusable side towards the BACK fabric.
26) Cut the interfacing to match the circle of the BACK circle, and pin together
27) (Now you will really start to hate ironing) Iron the INTERFACING to the back fabric, per instructions on the INTERFACING
Getting There
28) Put the front and the back fabrics together, but RIGHT sides facing each other. Pin them together and sew.
29) Decide your least favorite spot on the tree skirt (where you want the opening to be). Fold the skirt in half, and then again, so you have a perfect line to cut, and then
30) Cut it (even if it makes you sad), and then follow the cut in the body fabric (that makes the little hole for the tree trunk). We checked to make sure it was round, before we did this cut.
31) Cut your ribbon ties, and place them where you want them. Remember to put them, so the LONG side is actually inside the tree skirt, and will be on the outside, when you turn it right side out.
32) Pin the seam long the cut and in the circle. Mark an area to leave open so you can turn it right side out. We chose on one side of the straight cut, close to the center.
33) Sew along this line, remembering to skip that spot just mentioned.
34) Flip your tree skirt RIGHT side out through that little hole
35) Make sure everything looks nice, and then iron it flat
36) FINAL STEP, Sew a seam around the entire skirt, along the straight opening (and sew your flip hole closed) and around the inside circle
37) Lay it on the floor, take a shot, and celebrate!!!
38) Send us a pic of your skirt!
Some comments about this pattern.
1) It doesn't have enough fabric for a back, so I would suggest either buying a 3rd fabric for the back, or more of the trim fabric, IF you don't want to do the piecework we did.
2) There is a TON of leftover fabric, so have some ideas for pillows, stockings, OR a cute bag with a drawstring that you could use for a reusable gift bag!